Prerequisites
- Docker and Docker Compose installed
- Node.js 18.4.0+ (for the CLI)
- An MCP client (Claude Desktop, Cursor, etc.) — or just test with the CLI
Step 1: Start Latch
- Latch server on port 3000 (dashboard and API)
- PostgreSQL for data storage
Step 2: Create Your Account
- Open http://localhost:3000
- Click Register and create an account
- You’ll be taken to your first workspace
Step 3: Create an API Key
- Go to Settings → API Keys
- Click Create API Key
- Give it a name (e.g., “local-dev”)
- Copy the key — you’ll need it for the CLI
Step 4: Create an Upstream
An upstream represents the MCP server you want to protect.- Go to Upstreams in the sidebar
- Click Create Upstream
- Choose Stdio (for local MCP servers)
- Name it something descriptive (e.g.,
filesystem)
Step 5: Sync Tools
Use the CLI to discover and register the tools from your MCP server:Arguments in
--upstream-args must be comma-separated, not space-separated.Step 6: Create a Rule
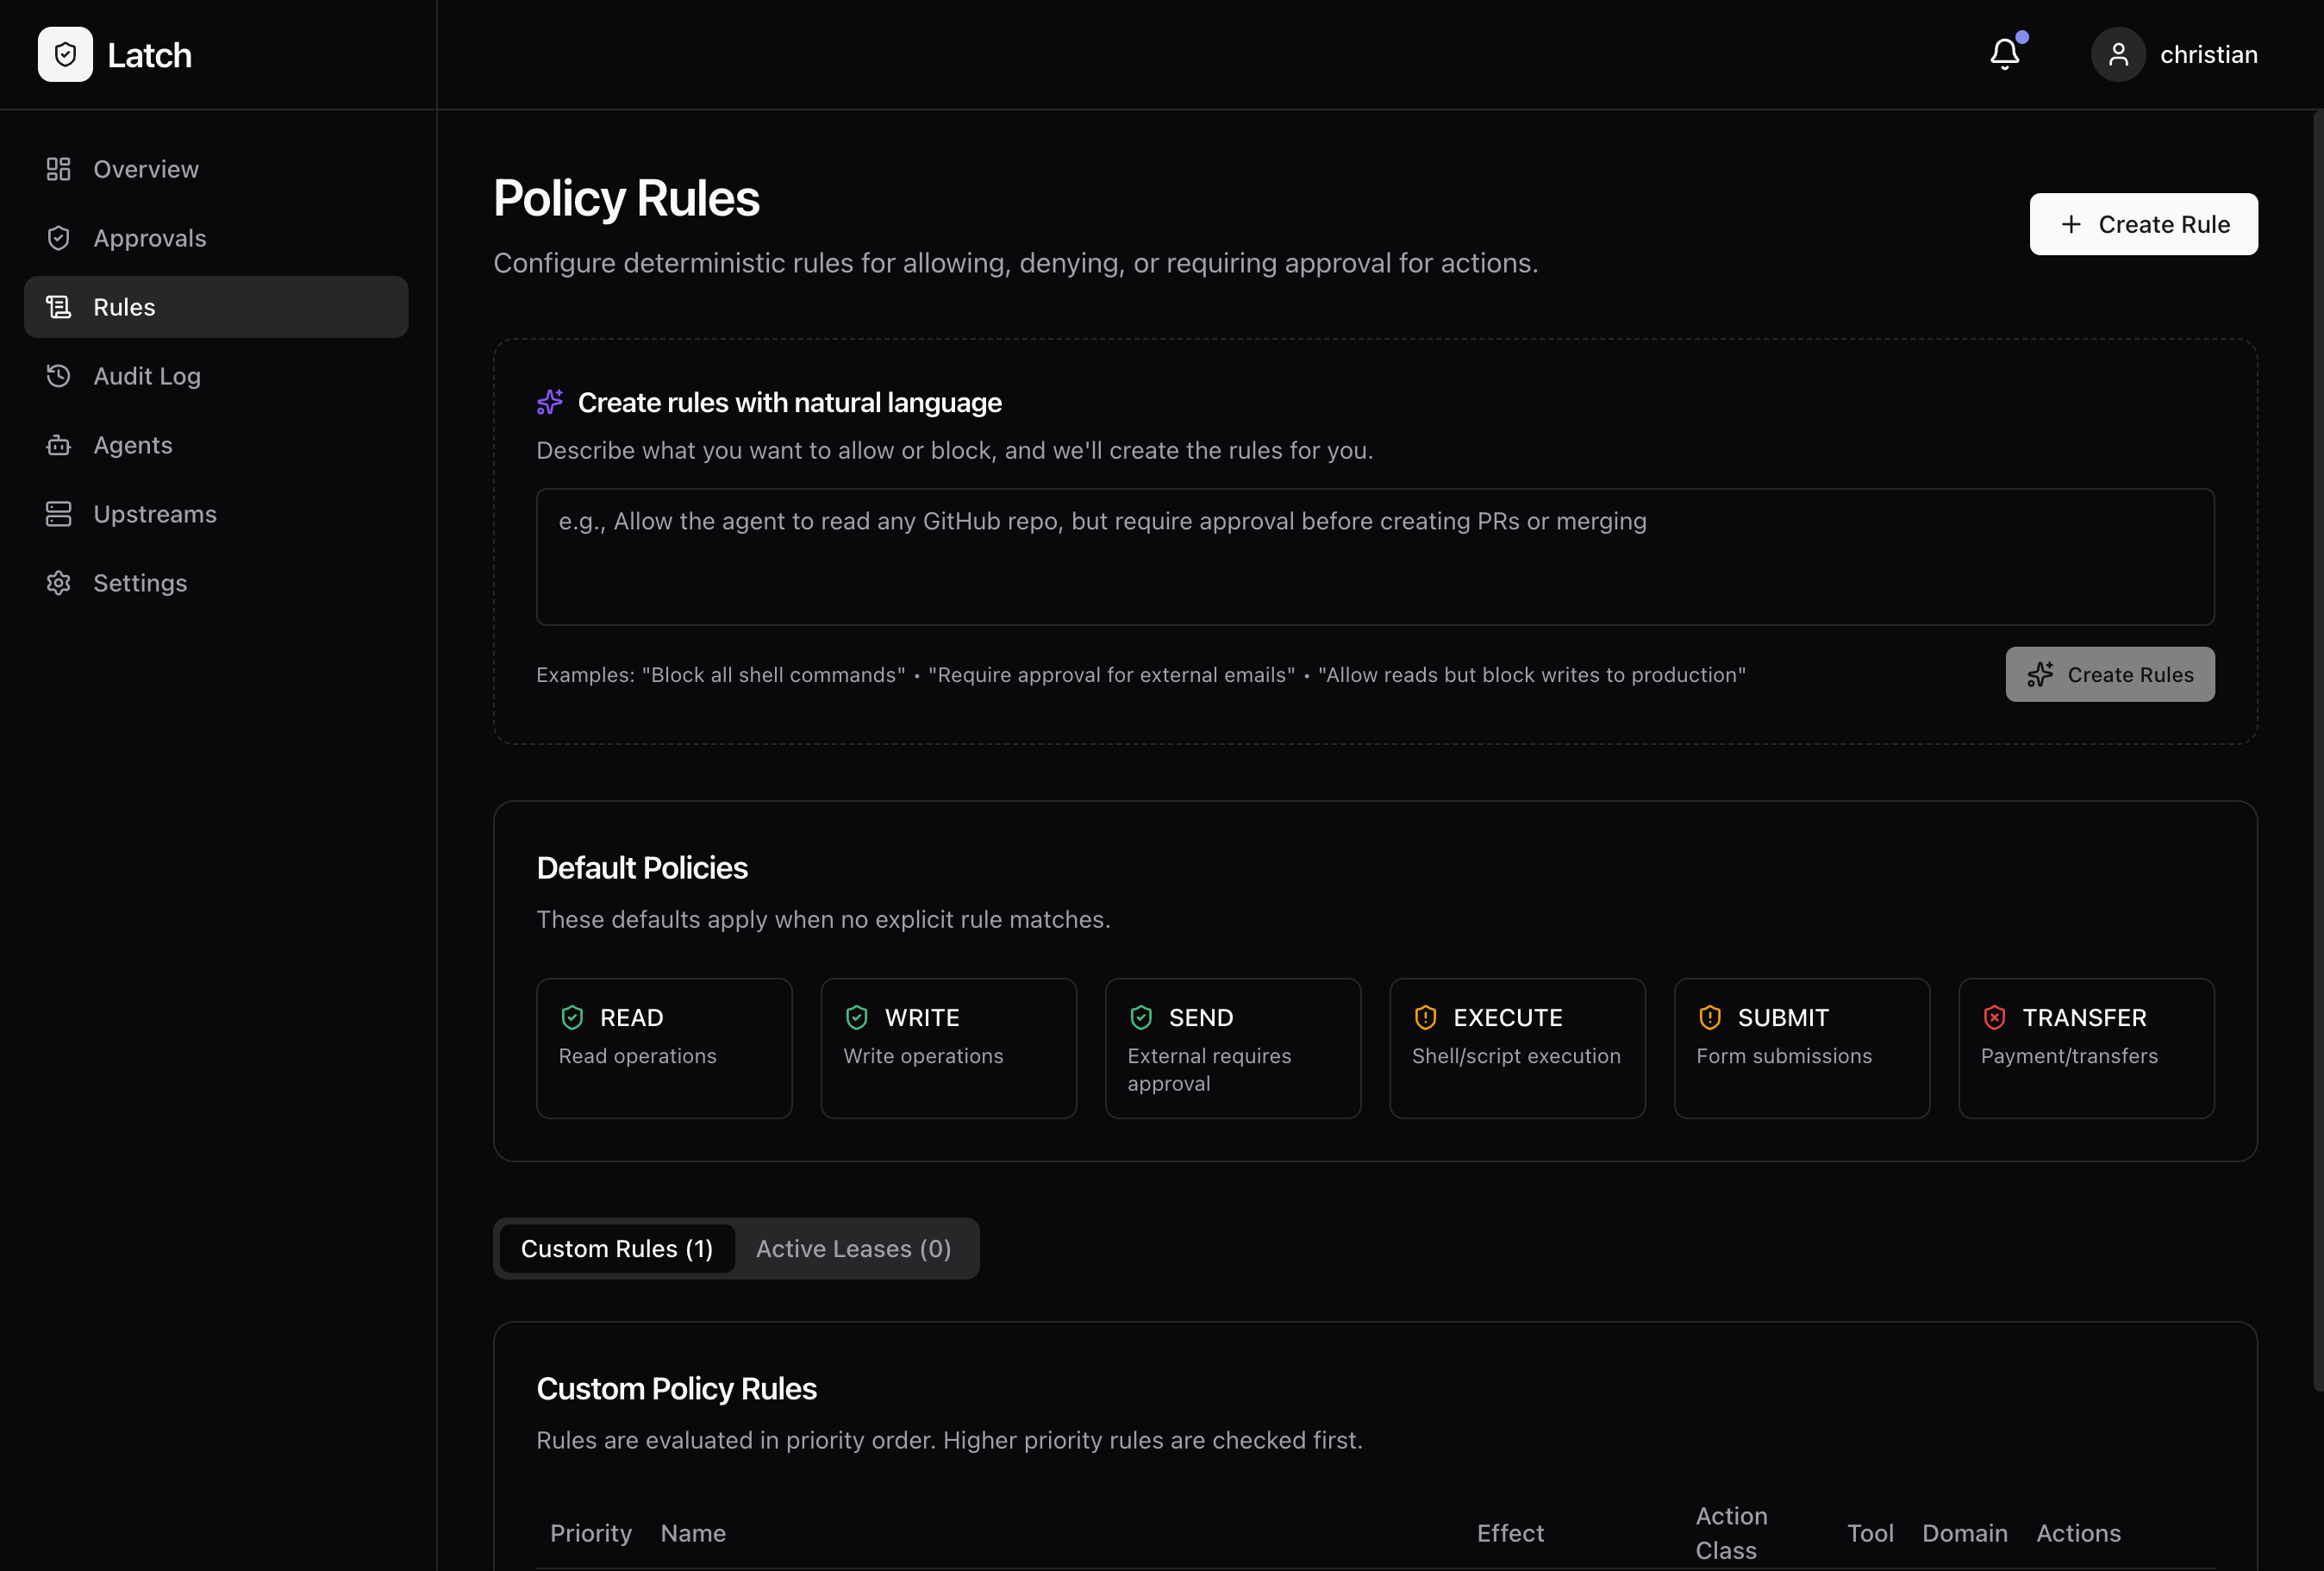
Let’s create a simple rule to require approval for file writes.- Go to Rules in the sidebar
- Click Create Rule
- Configure:
- Name: “Approve file writes”
- Effect: Require Approval
- Action Class: External Write
- Upstream: filesystem
- Click Save
Step 7: Test It
Run an MCP server through Latch and try a write operation:Testing with Claude Desktop
See the Claude Desktop Setup guide to configure Claude to use your protected MCP server.Testing with the Dashboard
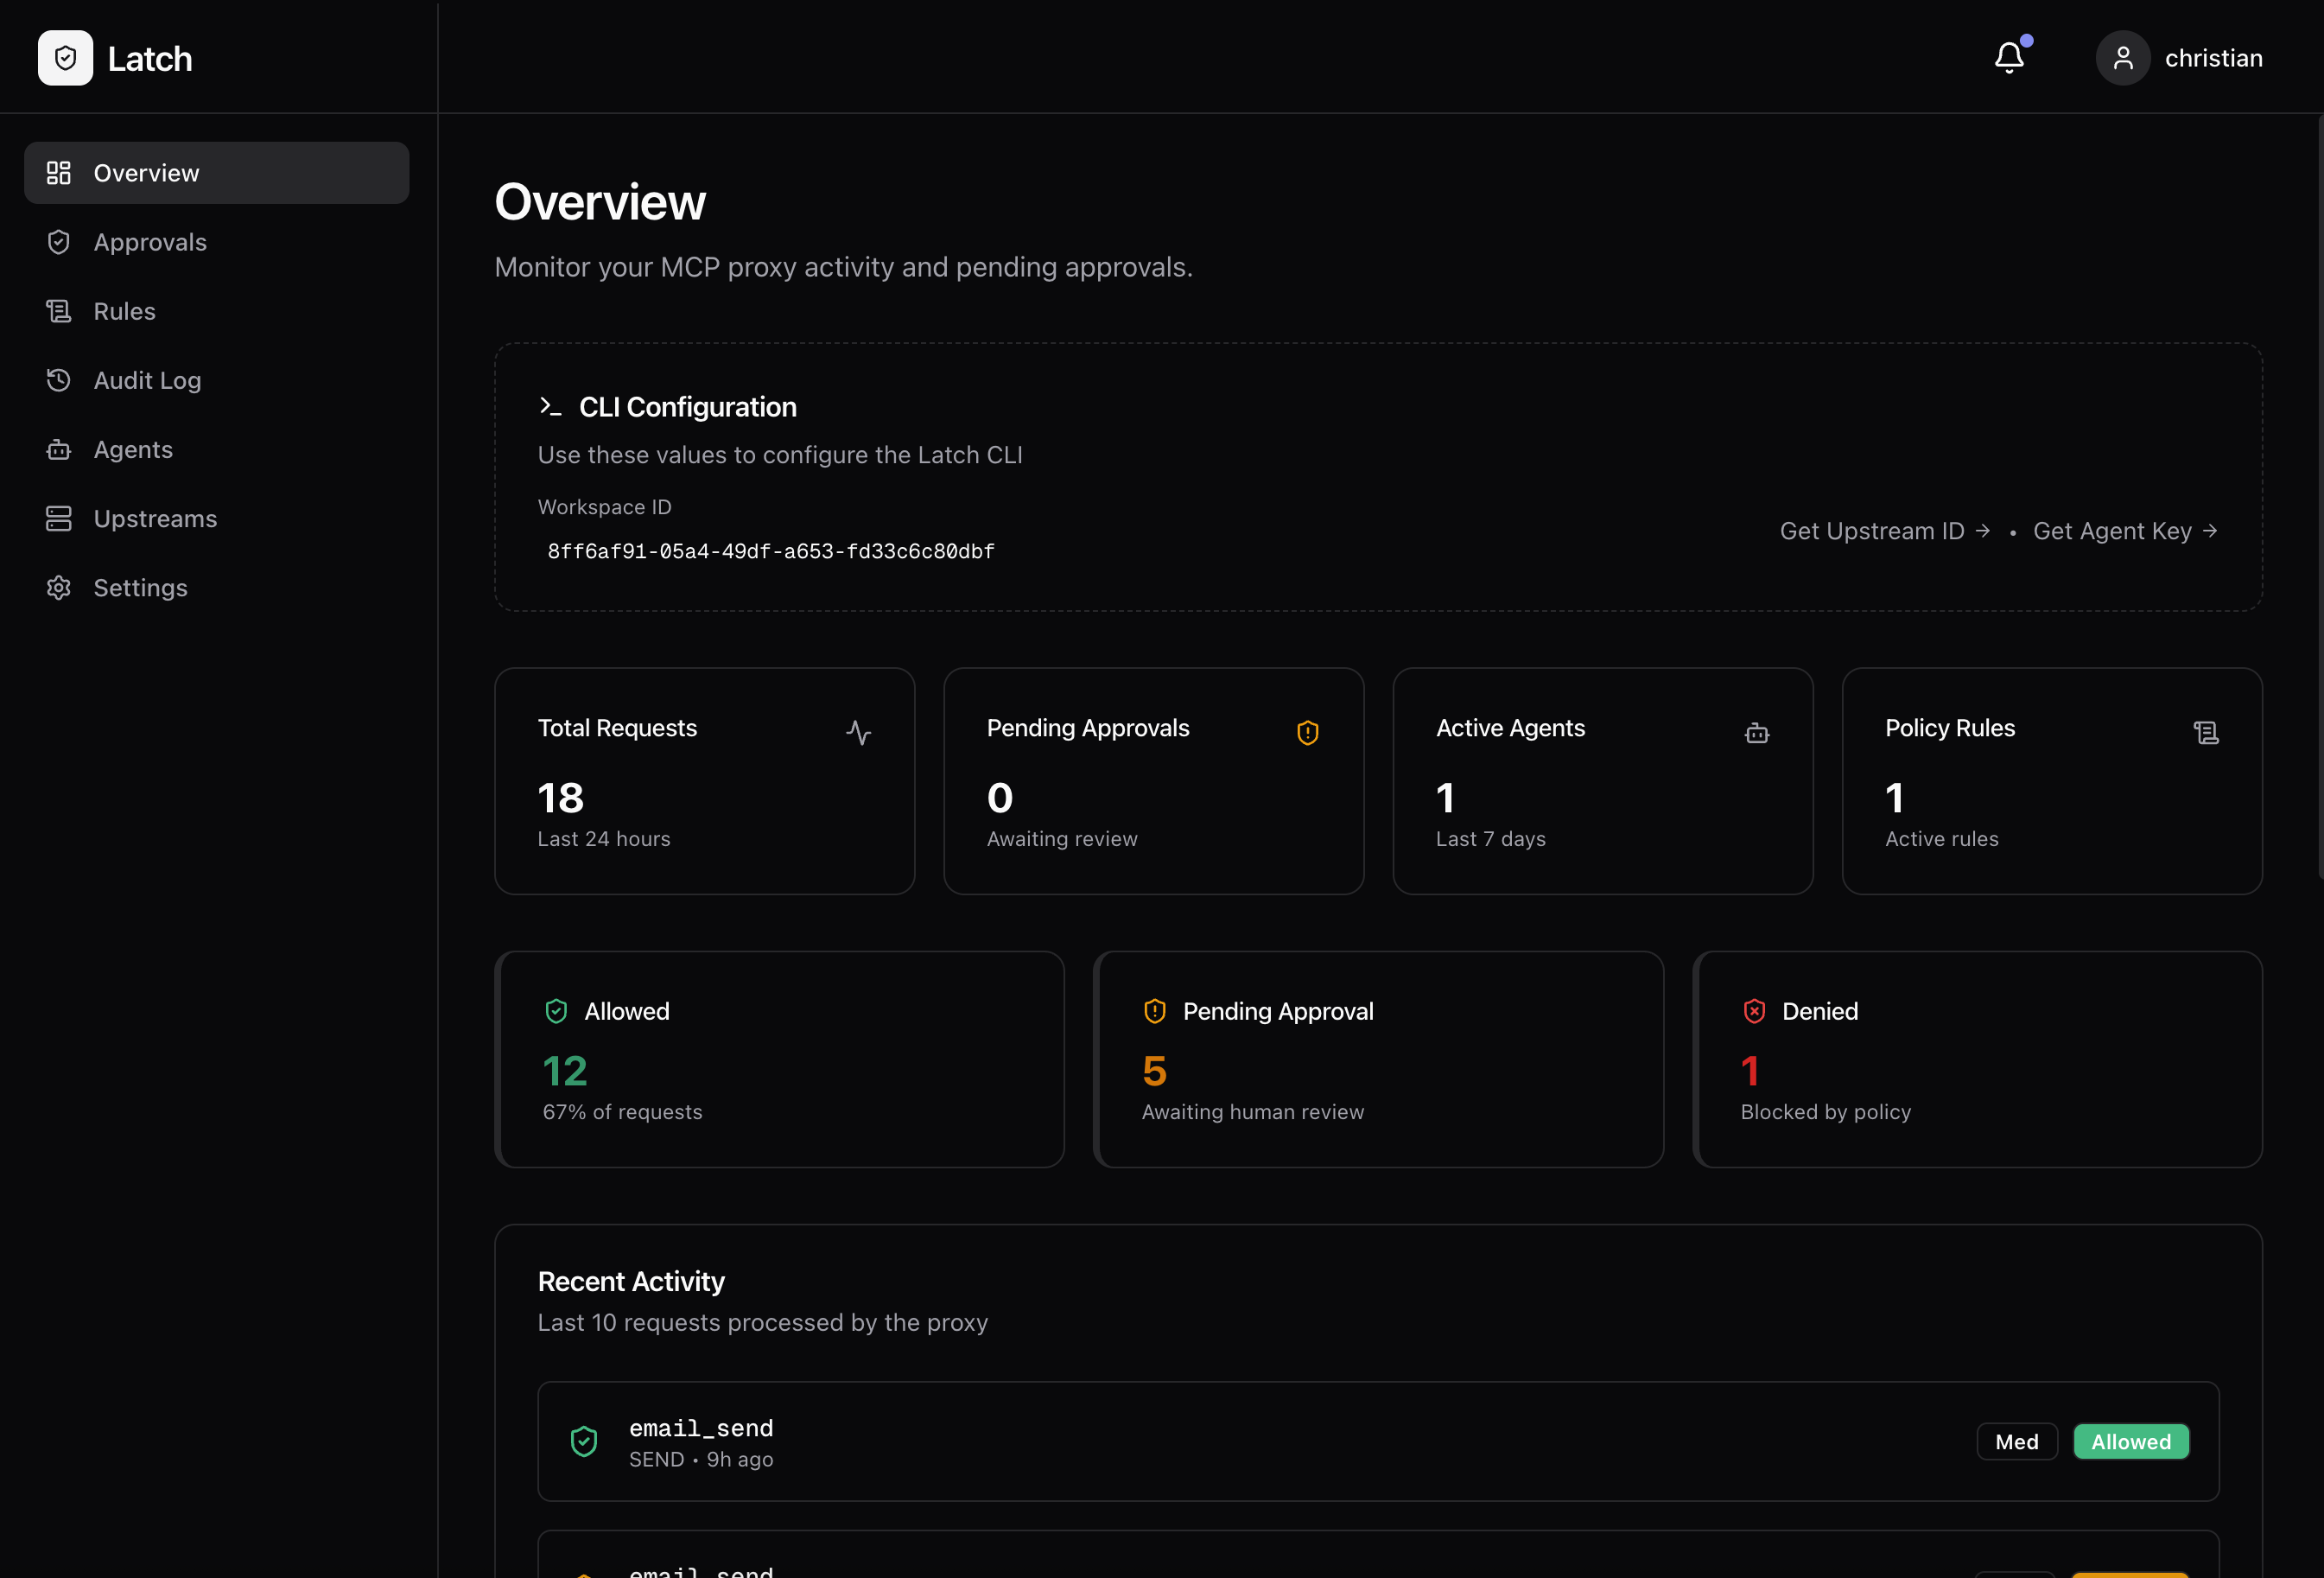
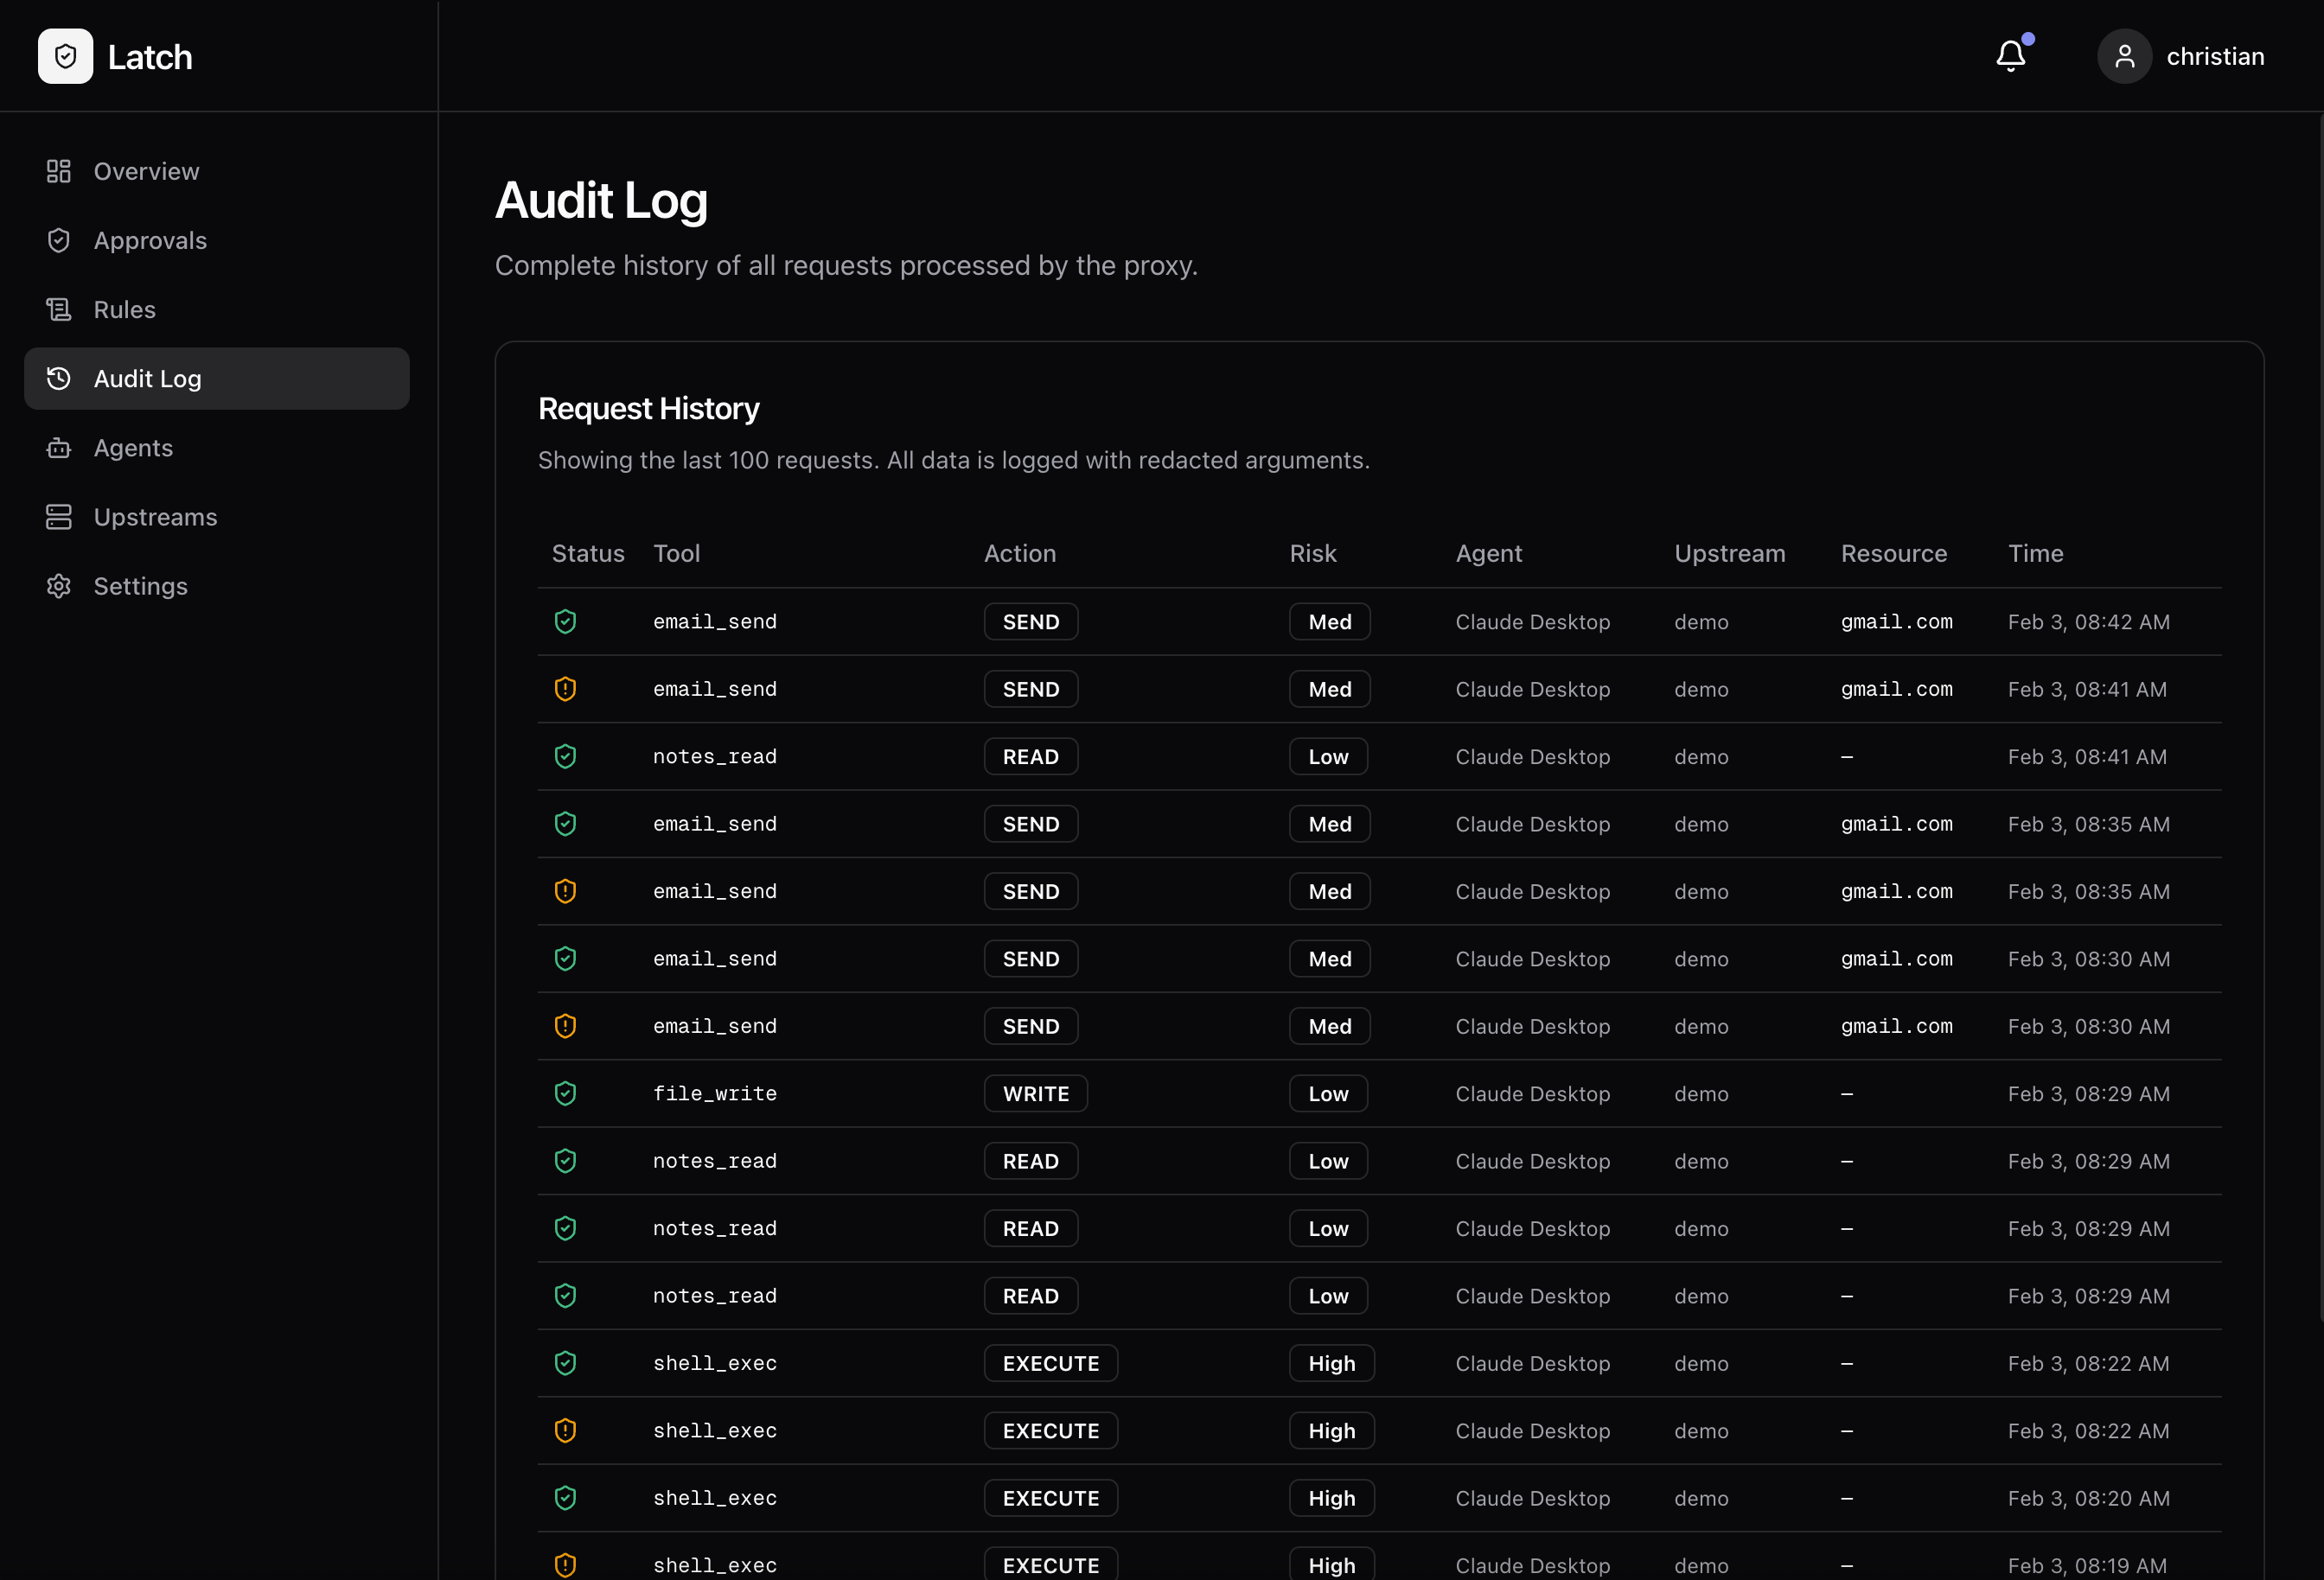
- Go to Audit Log to see incoming requests
- If a request requires approval, you’ll see it highlighted
- Click to approve or deny
What’s Next?
Claude Desktop Setup
Connect Claude Desktop to MCP servers through Latch
Policies
Define what actions are allowed, denied, or require approval
Telegram Notifications
Get mobile alerts and approve requests on the go
Configuration Reference
Environment variables and advanced settings
Troubleshooting
Dashboard won’t load
Check if containers are running:CLI can’t connect
Verify Latch is running:Tools not appearing
Make sure you rantools-sync after creating the upstream. The sync command discovers available tools and registers them with Latch.